In This Small Kitchen

The other day, I looked at the price on the box of quinoa and saw a stamp of $7.99. Twelve ounces of Ancient Harvest brand quinoa (by far the best-tasting) had soared up to eight dollars! From 2007 to to 2013, the price per pound of quinoa doubled, but this was the first time I’d seen the box retail for quite that much. I put it back, went home, and started eating farro.

The story makes sense. The rebranding of quinoa as a superfood turned it into a grain we ate all the time. But unlike rice, which has long fed the world’s daily habits and has production mechanisms more able to meet demand, quinoa growing remains the province of Peru and Bolivia. Yield has increased, as have exports, but probably not enough to power the 4.4 million quinoa salad recipes on the internet. So, the price goes up, and maybe those of us who aren’t willing to pay a premium back off.

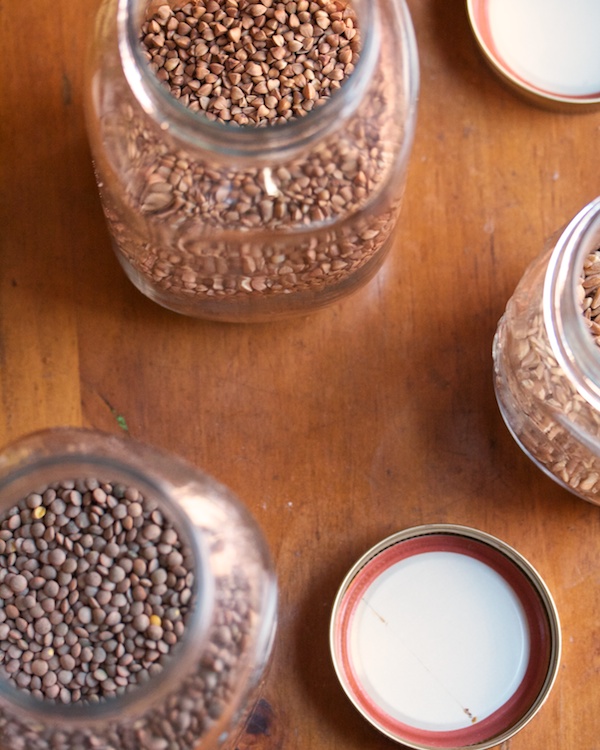
And where will we go? In case you, too, are reeling from the price hikes, I’ve made some notes on the grains, legumes, and nuts we’re eating instead of our bi-weekly quinoa. In looking to substitute for quinoa, I try to account for two aspects of the seed that have made it so popular: it’s a complete protein, and every bite delivers a lovely caviar-like pop. If you haven’t tried some of the grains I mention below, then quinoa might have one more power: as the gateway grain.

There’s nothing worse than wasted ingredients. And yet I can’t quite bring myself to save carrot scraps and tops and celery ends in baggies in the freezer’s few vacancies for some stock I might make one day. I wish I felt the same way about not hoarding yarn for potential sweaters or socks for potential jogging impulses, but so far the urge has applied only to those scraps of vegetation that better cooks/composters/planners than I are economically amassing right now.

There are other ways to be seriously resourceful (phew!), to cater to future appetites with food purchased in the past. Here’s how that philosophy has swooped into my kitchen recently, taking would-be leftover cilantro and parsley and turning them into green sauce. This works better than the stash and save approach because you can make green sauce in the same fit of cooking motivation that brought the enormous bunch of cilantro into your life in the first place. Leave the bunch out while you eat dinner and work on your green sauce when you do the dishes.

Once pulverized into salsa verdes and pestos and covered in olive oil, fragile leaves last much longer than they would have if left to their own limp devices.

The first sauce, Italian salsa verde, is good piled on anything remotely plain: roasted chicken, avocado toast, scrambled eggs, roasted vegetables. There’s richness and brininess to complement all those herbs, and I can’t say no to heaping dollops. To make, put a minced shallot in a little bowl and cover with cider vinegar. Leave that to steep for 10 minutes. Meanwhile, put your bunch of parsley (some stems are fine), an anchovy, 1 teaspoon capers, and 1/2 teaspoon salt in a mini food processor. When the shallot is ready, drain and save its vinegar, and add the shallot to the mix. Pulse to pulverize. Then add up to 1/2 a cup of olive oil to make a sauce. Store in the fridge for up to 2 weeks.

The second, a sort of Mexican cilantro pesto sits pretty on a plate of rice and beans or a more trumped-up burrito bowl. I added minced ginger and scallions to a few spoonfuls of my recent batch, then mixed that new stuff in with fresh ramen noodles for a sort of pan-Asian pesto that reminded me of ginger-scallion sauce and was unbelievably good with a fried egg on top. To make, combine 1 clove garlic, 1/2 teaspoon salt, 1/4 cup toasted pepitas (or whatever nut you have), your bunch of cilantro, and a squeeze of lime juice or a pour of mild vinegar in the food processor. Pulse to pulverize, adding up to 1/2 cup of olive oil as you go, to make a sauce. Add 1 tablespoon minced ginger and 4 minced scallions to migrate the sauce from Mexico to Asia.

In a pinch, these sauces add both flavor and real nutrition to your meals-herbs are really vegetables, after all! If you want to bulk out either one, a few handfuls of baby spinach or arugula leaves leftover from salads are welcome too.

More saucy ways to use up your herbs: herby avocado hummus, Sarah’s green sauce, green harissa, green goddess soup, whole wheat pesto pasta with rabe.

Though food safety fears have driven us to put food in the fridge ASAP if we’re not planning to eat in the next ten seconds, my own observations of chefs and serious home cooks reveal that not everybody follows USDA guidelines to the letter-which, by the way, allows commercial chefs to leave cooked food out for four hours (home cooks, for whatever reasons, only get two).

When entertaining, dishes that can be left, worry-free, at room temperature are obviously a boon to the host’s organization. Less known is the fact that the best brown bag lunches are equal candidates for short-term room temperature storage. Here’s why.

Eating food cold kills a lot of flavor. Reheating lunches in the office microwave is depressing, plus the microwave leaves all those vexing cold spots in a dish. Since I adore bringing my own lunch-the mid-day journey to find a bad, expensive sandwich just about does me in-I’m always looking for ways to make even a humble packed meal more delicious. And a safe two-to-four hour (aka all morning) marination at room temperature does just that, giving flavors in grain bowls or chicken salads time to mesh in the best way. The bread on your sandwich stays crusty, and last night’s leftovers morph from congealed to inviting. Even soup, which you’ll still want to microwave, will warm up faster if it starts from room temperature. Plus, the texture of room temperature food is better.

Still, when you have a debate in which food scientist Harold McGee chides cooking expert Michael Ruhlman about his food storage habits, you do want to be careful. Refrigerate lunches that spoil easily, like fish and fresh cheese. The USDA’s tips for college students are surprisingly readable, if you want to know more.

P.S. 11 Low-Carb Lunches (so you’ll stay awake this afternoon).

We could call dinner-time resourcefulness the act of placing tonight’s take-out order from the one subway stop with reliable cell phone service in order to time your homecoming with your spicy salmon roll and miso soup’s arrival.

Or we could, you know, step it up a notch and embrace the home-cooking version of ultimate efficiency.

It’s a simple step: Start something.

As soon as you’ve walked in the door, but before you’ve changed into sweats, checked your email to see what you missed during your commute, or collapsed on the couch, do one easy thing to get dinner going. It should be a task you can then step away from, because once you’ve started your thing, you’re going to take a break. Now is when you shed your work outfit, greet your roommates or significant other, and rifle through the pantry for inspiration. After that is when you’ll make the rest of dinner, which isn’t so hard anymore, because you’re already halfway there.

Here are four things you can start the second you’re home, long before you lose motivation.

Boil some water. Fill a big pot, cover it, and place it on the stove. This is for pasta, most likely, but maybe it’s for the potatoes you discovered in the bottom of the vegetable drawer, or even for poached eggs. You can also make rice and quinoa this way if it fits in better with the rest of your meal prep.

Sauté onions. Set a skillet over medium-low heat. Chop or even slice an onion. Pour in some oil and add the onions. Mix once to coat the onions. Adjust the heat even lower so they don’t burn while you’re doing other stuff. When you come back, you could add tomatoes for sauce, beans for refried beans, or vegetables and eggs for a Persian omelet.

Turn on the oven (& roast some chicken). Turn on the oven to 425°F. While it preheats, change your clothes. You can put anything in there (roasted vegetables with pomegranate vinaigrette, maybe?), but I especially recommend selecting two skin-on chicken breasts, patting them dry, placing them on a baking sheet, drizzling them with olive oil, and sprinkling well with salt and pepper. Roast for 30 minutes, til the chicken’s cooked through and the skin is crispy. Serve with rice or bread and a simple sauté or salad.

Cook rice. What’s not good on top of rice? Curry, stir-fry, black beans: you name a simple dish, and I bet I’ll love it with rice. To make: rinse the rice til the water runs clean, then combine with water as per package directions. When the pot boils, turn the heat to low, set a timer, and be off on your business (of relaxing and/or cooking the rest of dinner).

P.S. 11 of the easiest dinners you can possibly make.

Some old health advice from Fannie Farmer, the 19th-century culinary expert: “But for its slight deficiency in fat, wheat bread is a perfect food,” she wrote, “hence arose the custom of spreading it with butter.”

The dwindling quality of much of our bread aside, there are days when I wish we still believed that-both that bread is perfect food and that butter makes bread better. Like, baguette-, naan-, focaccia-, r’ghaif-, and pita-lovers before me, I think bread is the best side dish on the table.

Side dish? Really? But yes. If there’s not enough leftover salad to form a filling brown bag lunch, a fresh roll and some butter will turn those veggies into a real meal (plus give you an excuse to run to the local bakery and get out of the office). If vegetable soup sounds a bit meager, ladle servings over fried bread for bulk. And when spaghetti and meatballs don’t quite cut it, you know you need some garlic bread.

Turns out there’s a long tradition of carb-loving in this country. The side of bread is an old, humble, and resourceful habit finessed by early American settlers, according to Abigail Carroll in her book Three Squares.

The settlers had all kinds of adorable names for specific uses of bread on the side. There were sippets, decorative slices of fried bread, used for garnish and texture in addition to substance. Sops meant pieces of bread soaked in soup or stew-much like the Italian bread morsels on which minestrones sometimes get poured. Trenchers have the coolest explanation of all: The earliest colonial Americans didn’t have plates, so they used “trenchers,” thick slices of stale bread to hold their food, a old habit imported from Europe. Back in the old country, gentry would have donated their sauce-soaked bread to poor folk nearby. But in the hardscrabble colonies, the trenchers were valuable nourishment. Remember, bread was the perfect food.

Once, when I was living in France, a friend’s French boyfriend looked at me and said, “you’re a hippie, right?”

It was so weird, because while there have been Birkenstock phases in my life, my, er, French period was more a time of fitted black outfits and mascara than brown rice and lentils. (As it went, the French guy turned out to have used my curly blond hair as a window to my soul.)

Of course, as health and wellness have become de rigueur, granola crunchy has morphed into granola chic. Case in point, the extreme non-crunchiness of this delicious recipe which features kale, hemp seeds, and flax oil.

That means my jars filled with beans are hip, not hippie, as is a practice I’ve taken on: soaking my beans and grains before I eat them.

I mentioned soaking lentils as a timesaver in this Curried Lentil Soup recipe. And soaking does reduce cooking time-brown rice takes a mere half hour, and bean cooking gets whittled from several hours to just one (or even less). Pouring water over your beans or grains before you leave for work hardly counts as prepwork, but it’s a simple move to make dinner that night happen more quickly. As I learned from Michael Pollan and Isa Chandra Moskowitz, soaking also has nutritional benefits, as soaked grains can more easily convey minerals and vitamins to you. If you don’t get a chance to cook your soaked food when you intended, no worries! Just cook it the next day-for an even shorter period.

Here are a few ideas to get started soaking:

  • Your Morning Oatmeal. I always soak my oatmeal overnight. I find a noticeable difference in how long the bowl of oats keeps me full when it’s been soaked (til a late lunch!) versus not soaked (til 10am!). I stir in a couple teaspoons of yogurt, too, which helps break down the grains, making them even more digestible. I heat my oatmeal in the microwave, but you don’t have to.
  • Your Mixed Grains Bowls. Combine your favorite combination of grains and beans and pour water over in the morning. When you go to cook, you can use about 25% less water than you’d ordinarily use, and cut cooking time by about the same amount. I recently soaked 1 cup of brown rice, 2 tablespoons of pearl barley, and 1/4 cup brown lentils all day, then boiled them with 2 cups of water for 30 minutes. The amount of water and cooking time will depend on how long you soaked, so you’ll have to experiment with doneness-or try cooking them like pasta, which will give you more control.
  • Your Chicken Chili. This recipe for Healthy Chicken Chili is an all-time favorite. When I made it recently, I soaked the barley and about 3/4 cups of Rancho Gordo pintos overnight before adding them both where the recipe says to add the barley. I used only 4 cups of water instead of 5. Dinner simmered for just 30 minutes-and was incredibly delicious.

Have you ever soaked beans or grains? Are you interested in hearing more about it?

I’m so excited to be working with Skinnygirl Daily this month, to tell you about-and participate in-the Skinnygirl Healthy Habits Challenge (which you can enter here!). The challenge is about making better decisions for the mind, body, or soul, and you can chime in or follow along using the hashtag #SkinnygirlHH.

Anyway, though we don’t talk a ton about health here (I think it’s implied when you discuss home cooking), as winter winds down, and we finally approach spring, I bet I’m not the only one who feels a little, well, soft. I can’t wait to get back on my bike, to run around in the park, and to eat summer vegetables adorned with nothing but grill marks.

But one step at a time. While we wait for the days to turn warm and long, I wanted to tell you about a healthy habit I’ve adopted for the challenge that you could pick up right this second. Here it is: eat chocolate for dessert.

I’ve always loved sugar. I’ve loved it since I led my sister and neighbor on campaigns to steal marshmallows when our parents weren’t looking. But here’s the thing about sugar: it is often delivered with a lot of other food, enough sustenance to count as lunch-except that slice of cake never feels like lunch. When the fact sank in that sweets really were a treat, I delighted in applying the stomach space saved on sweets to foods that nourished me better.

That said, what’s a girl to eat for dessert? Here’s my answer: dark chocolate. It’s delicious, it’s easy, and it’s gloriously itself, meaning you don’t need tons of carbs or copious amounts of butter to make it delicious. I opt to keep an open bag of chocolate chips in the fridge, but you could indulge in a fancy chocolate bar, if that’s more your style.

What are your healthy habits? If you don’t have any, you’ll find great ones in the daily Healthy Habits Challenge emails - join here!

This post was sponsored by Skinnygirl. You can join the Healthy Habits Challenge (and enter to win a trip to NYC) here, and you should also check out Skinnygirl’s Tasty Nutrition Bar (pictured above)-they’re tasty yet healthy and include my dessert favorite, dark chocolate. They’re less than 170 calories and come in Chocolate Pretzel, Banana Oatmeal and Peanut Butter with Sea Salt flavors. Thanks for supporting the sponsors that keep Big Girls, Small Kitchen delicious!